Shearwater Sport Bevels – Part One

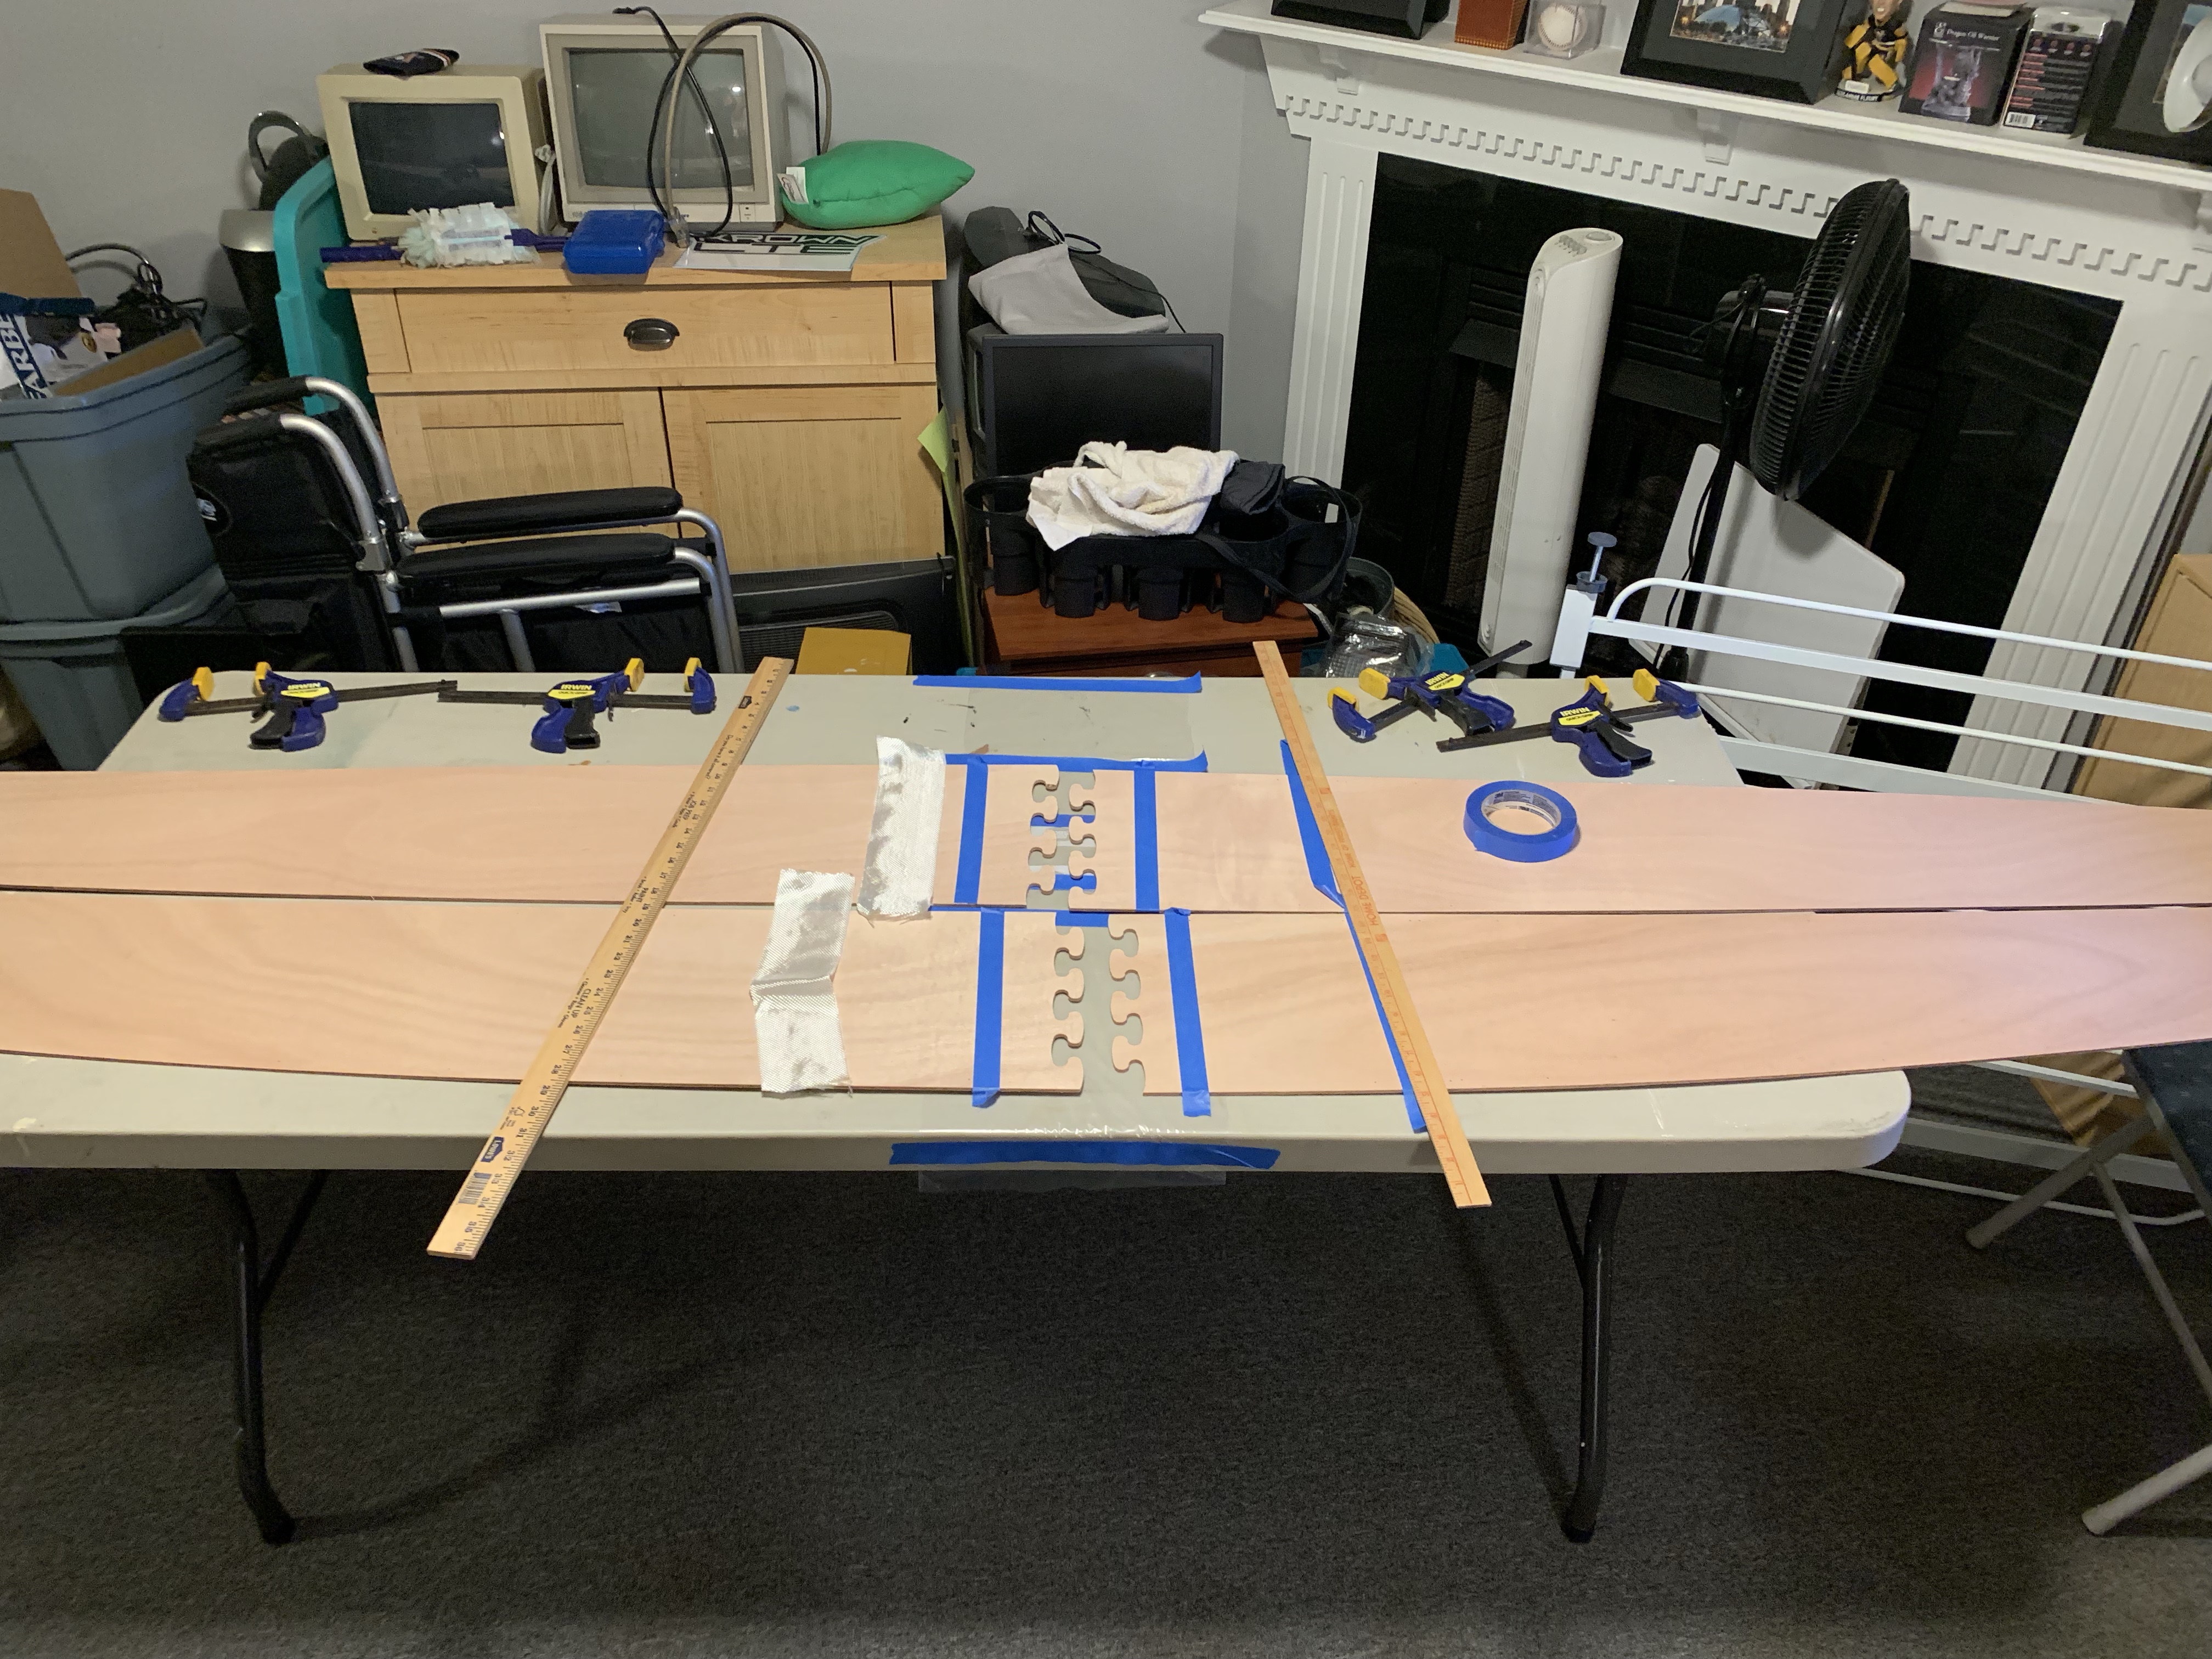
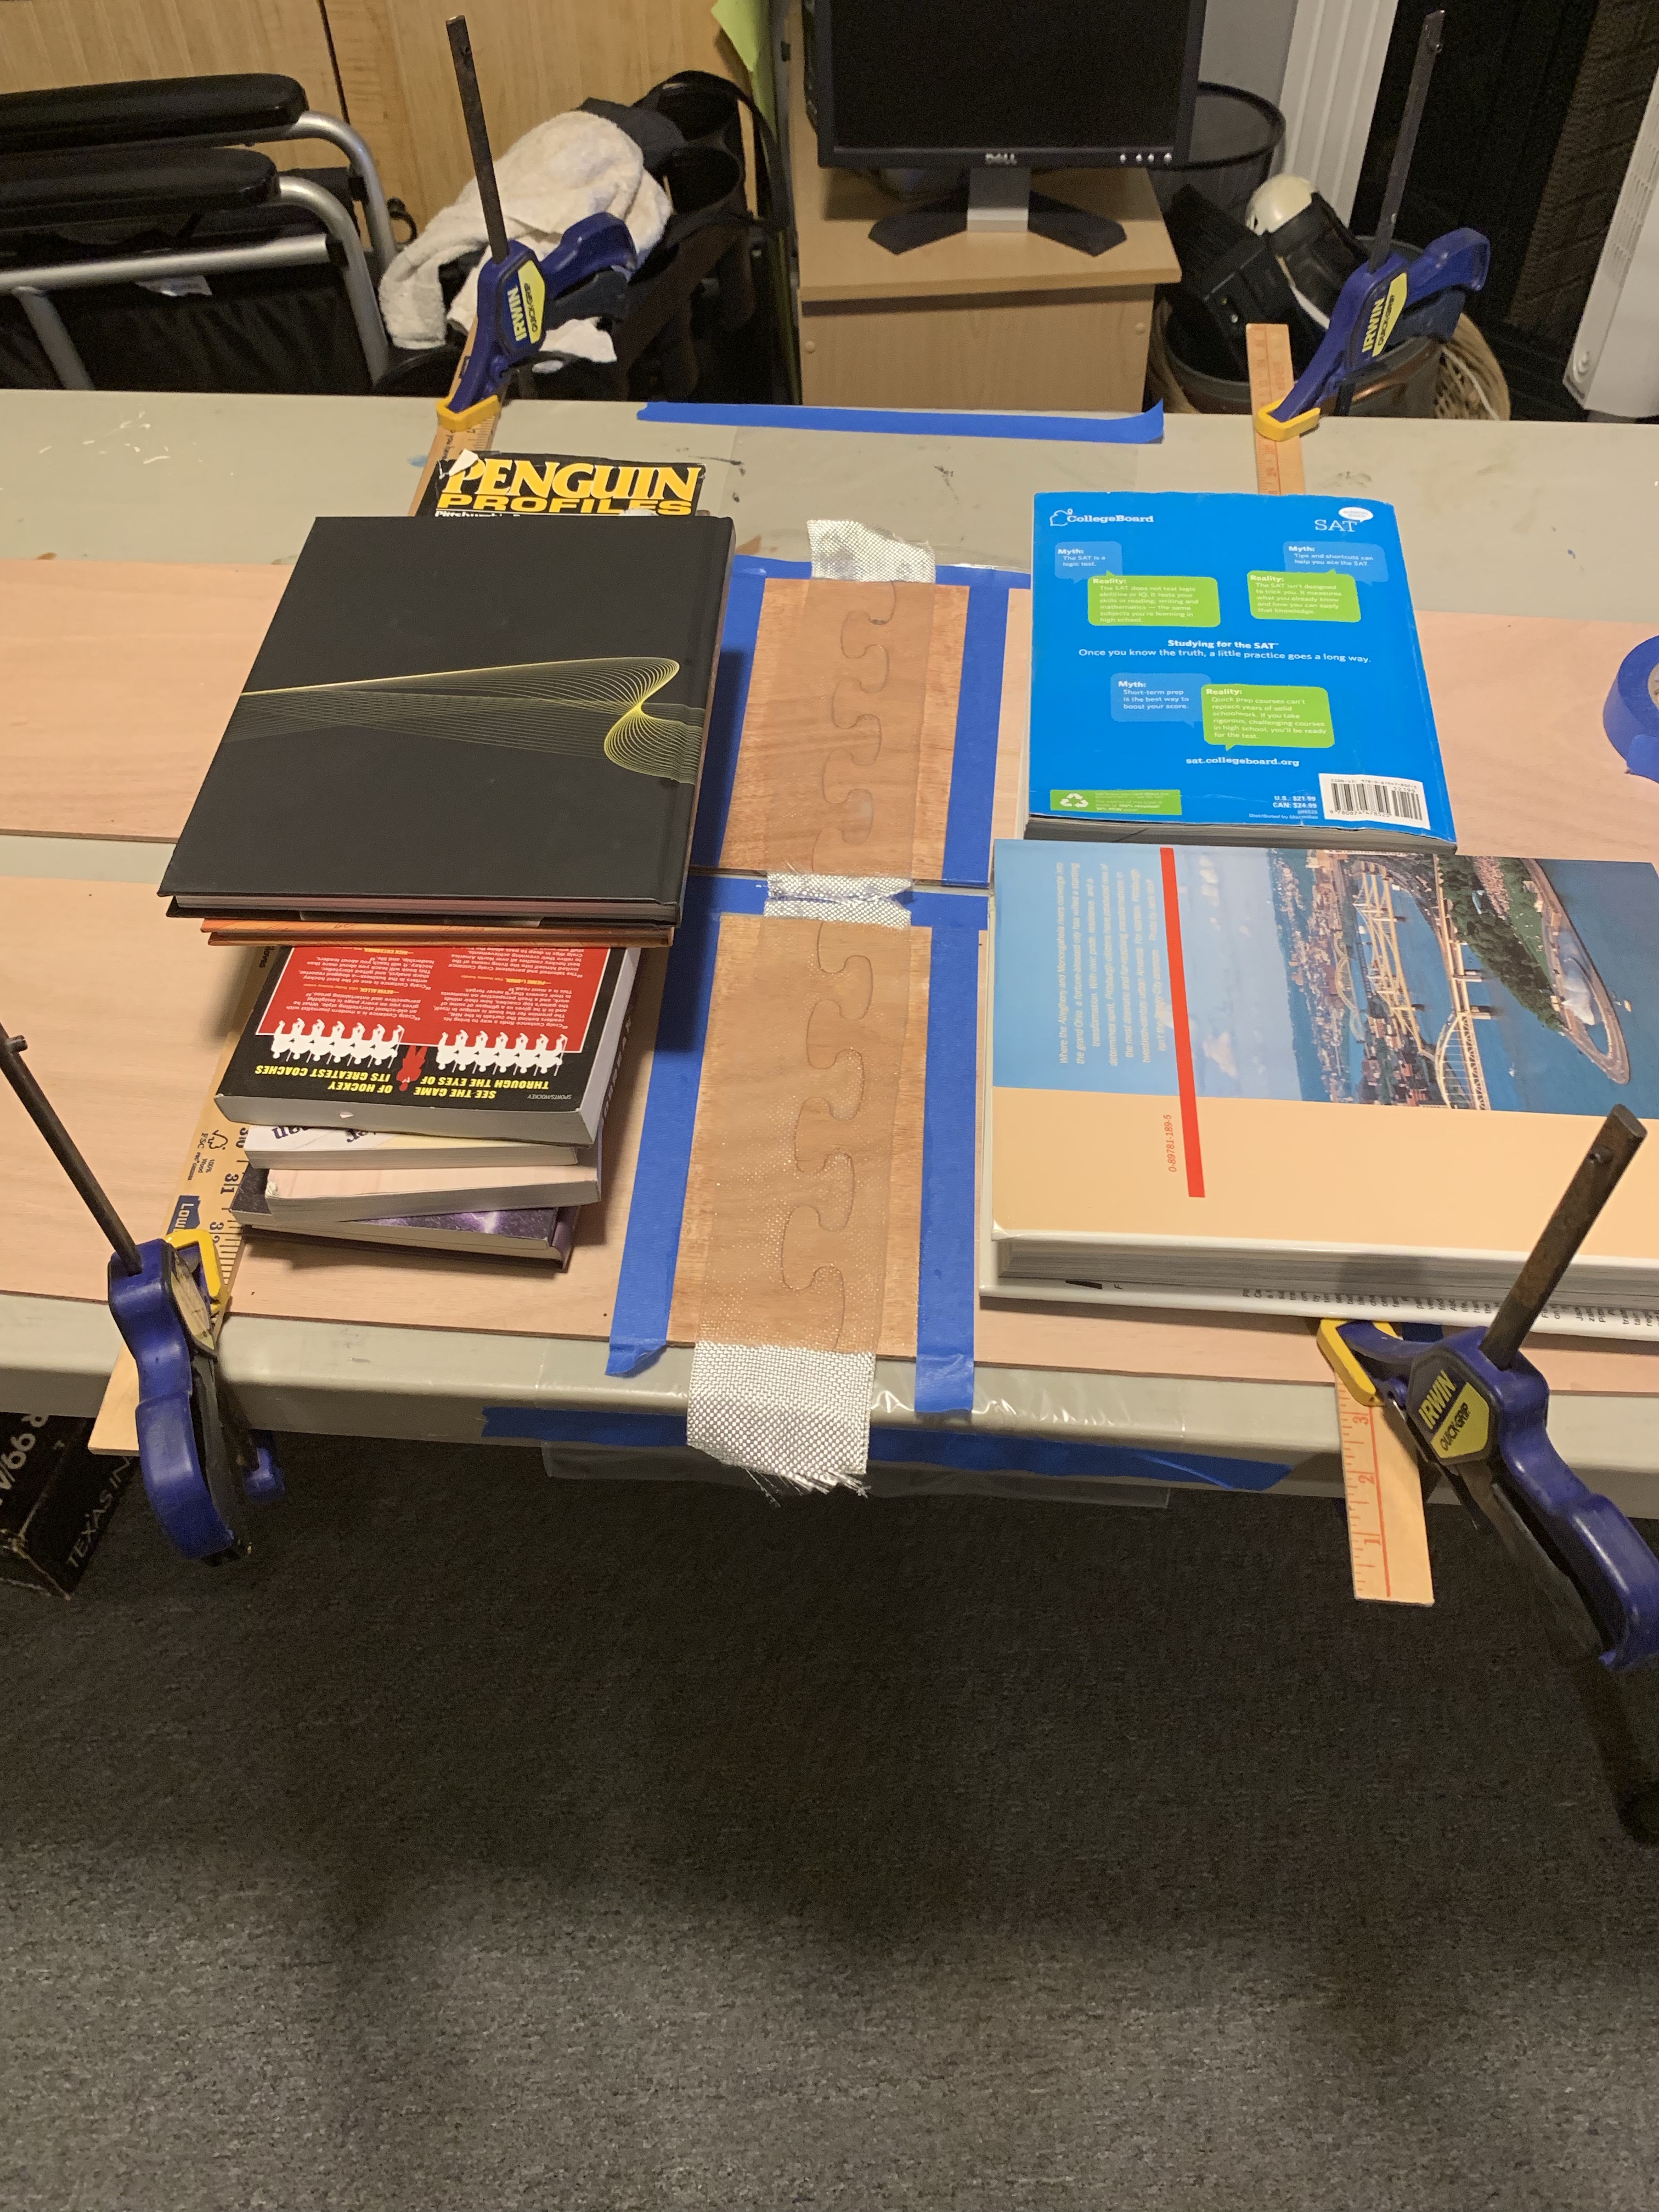
The next step after glueing up the panels is to bevel the edges to allow for tight fitting joints when the panels are stitched together.  There are basically two types of bevels, those on the ends of the bottom and side panels, and those along the length of all the hull and deck panels.

In this first post about bevels I will be showing how I went about the end panel bevels for the bottom and side panels.  I started with the side panels as they looked a bit less tricky then the very curvy bottom panels.

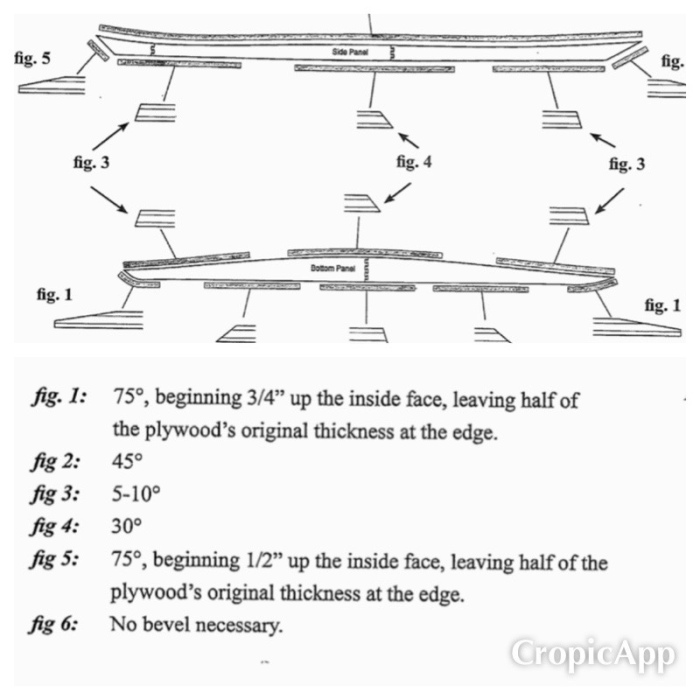
In the diagram below the side panel ends are to be beveled to 75 degrees, starting from a 1/2″ in the end of the panel, leaving 1/2 the thickness of the plywood.  The designer states that all angle are approximate, which is good because I’m not sure of a good way to measure.

img_6519

I did mark a reference line before planing, so that i could have a rough idea of how much to plane away.

img_6505-1

I started planing at the edge of the panel, with a shallow set blade in my plane. After a few passes the glue line of the first ply was visible and a couple of passes later I seemed to be about halfway through. This put the glue line about 1/4″ in from the edge.  Both ends of one side panel are shown below, I repeated for the other panel.

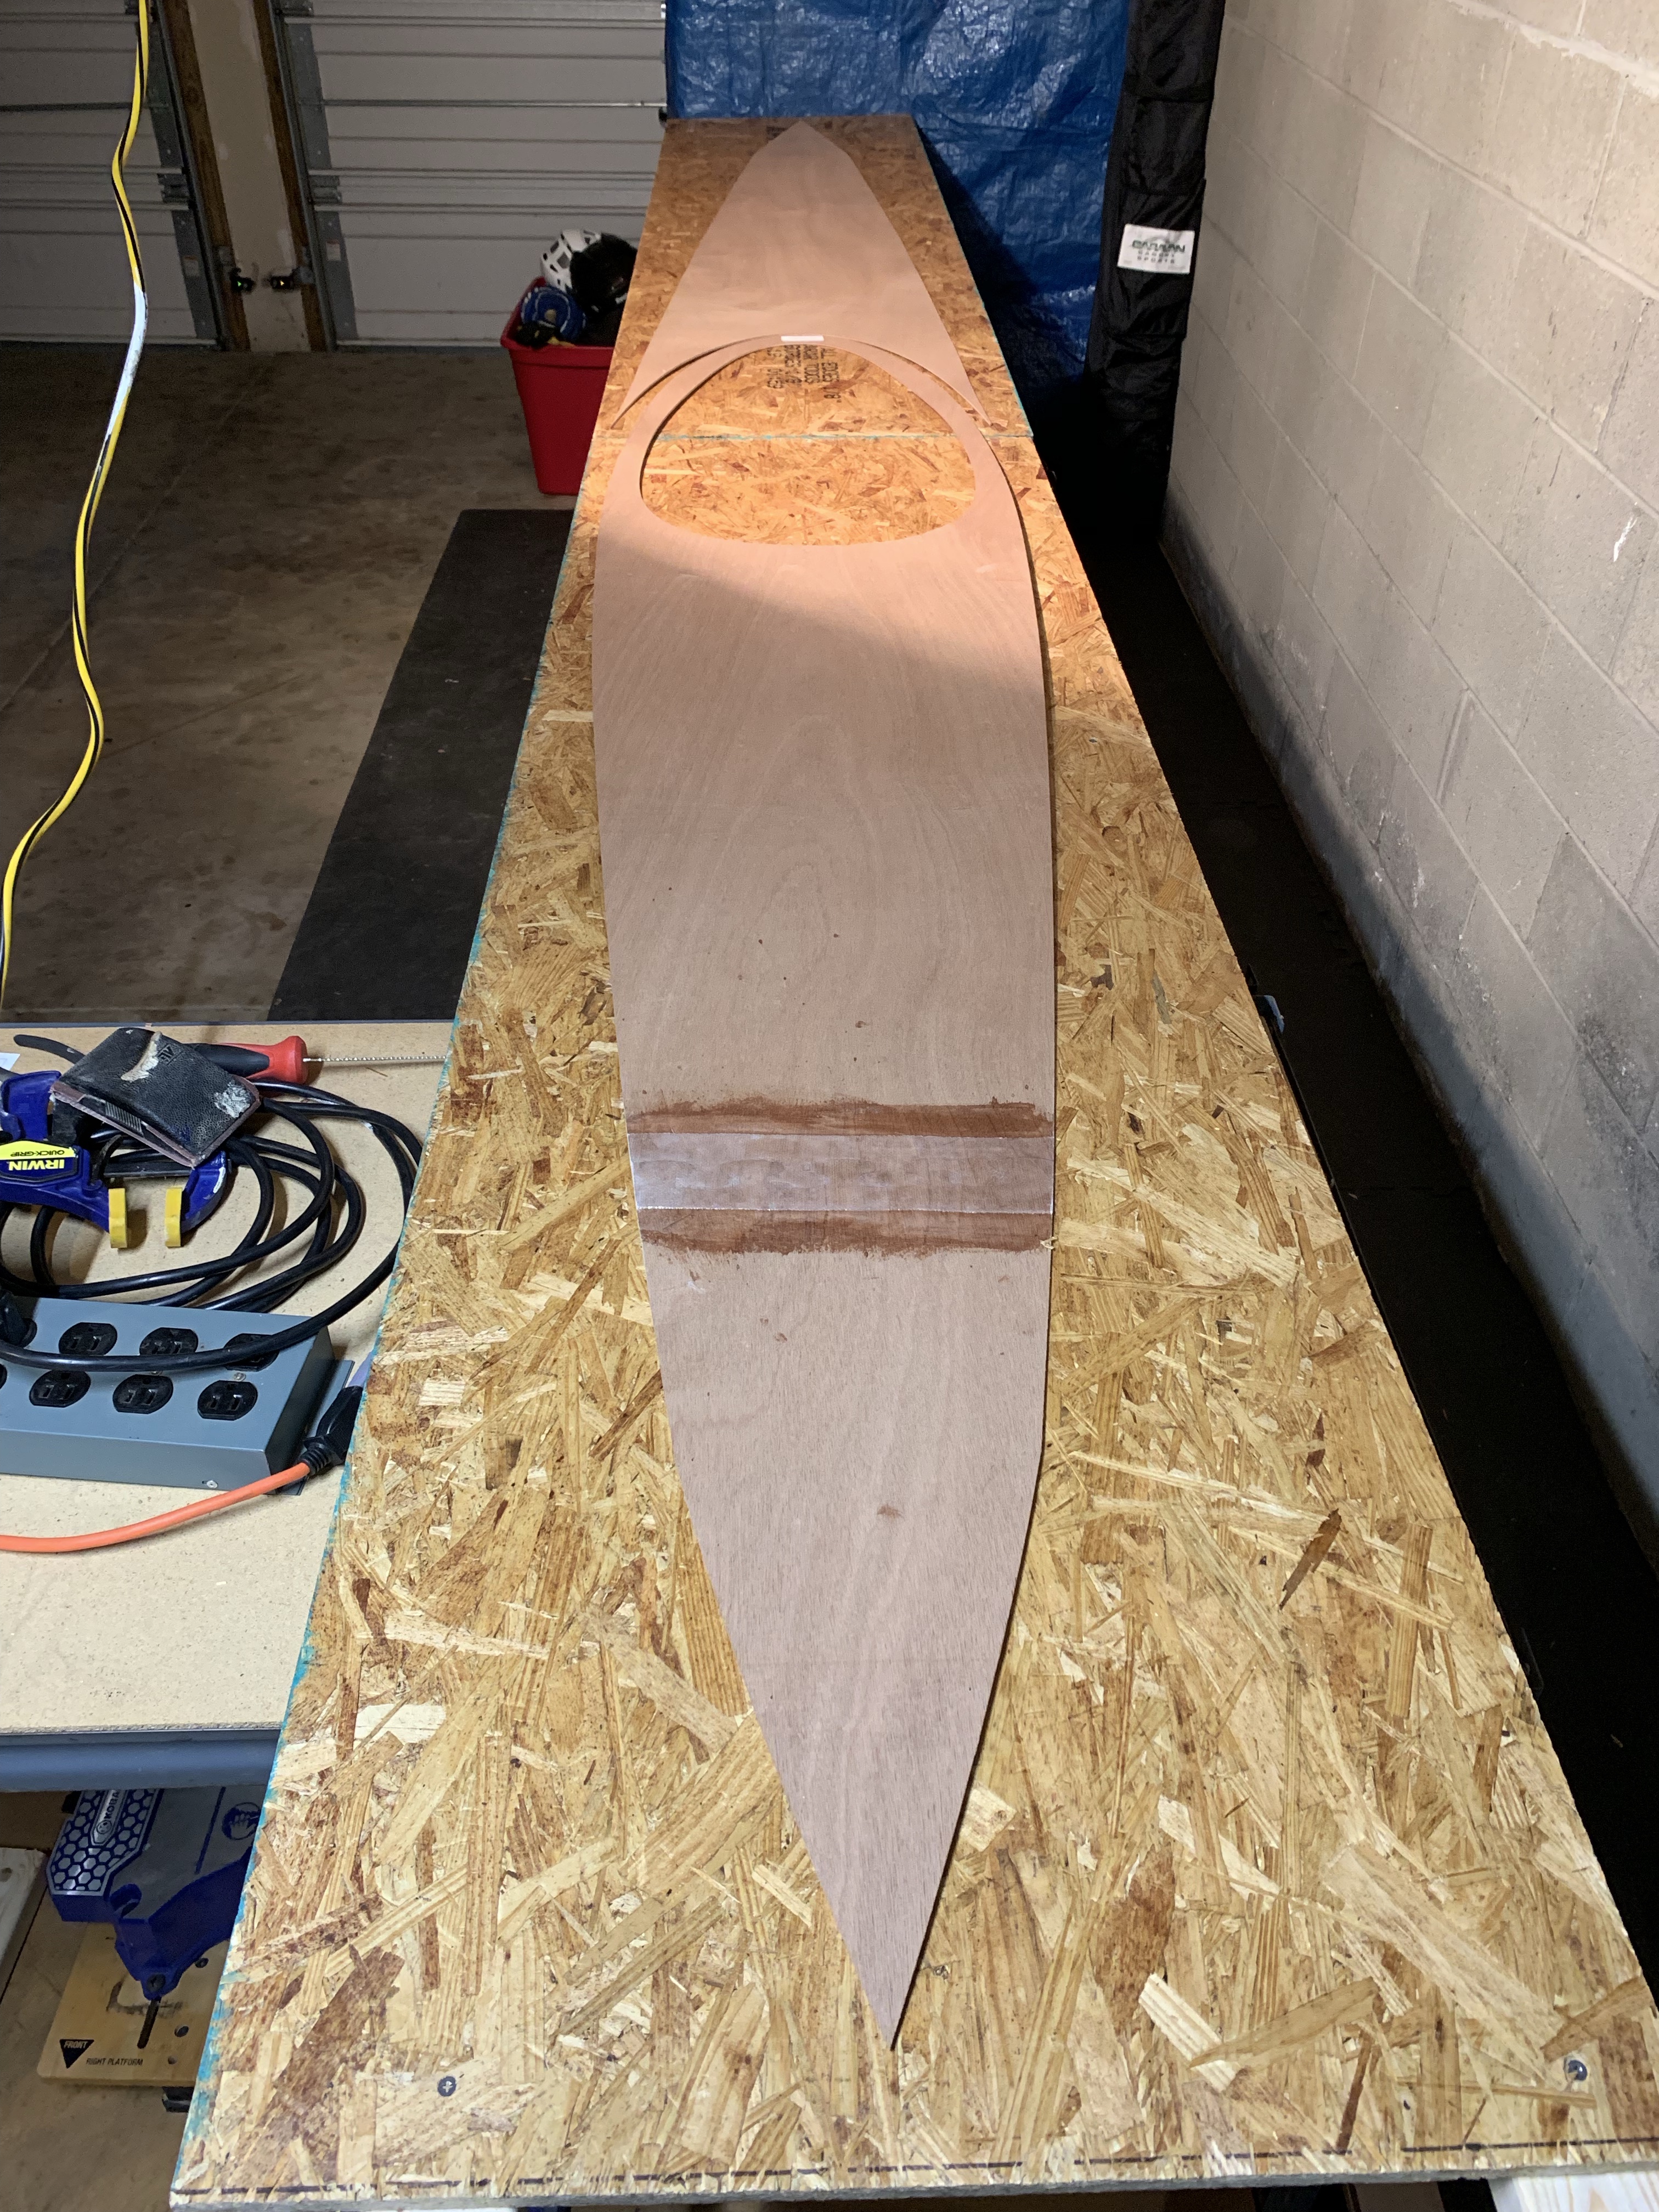
Feeling a little more confident I moved on to the bottom panels.  The instructions called for 75% and a width of the bevel of 3/4″ so I made reference lines and planed away. Then smoothed up the bevel with the sanding block.

Here are a few more pictures of the completed ends of the bottom panels. I over did it just a touch on the right one below.

img_6511


And two facing bottom panels and a side panel.

img_6513


Next step is to bevel along the edges in preparation for stitching up the hull…

Rear Deck Panel

Rear Deck Panel glue up completed. Started with cutting a ziplock bag open to put under the panel, then laid out the panels and glued up. 

A short video showing the glue up : Deck Glue Up


I used a work light for a little extra warmth on the slow hardener.

I also got a sheet of OSB and had it cut into two 2×8’ sheets and mounted on some 2×3” studs. Making for a nice smooth 15’ long bench in the garage. 

img_6489

Shearwater Sport – Side and Sheer Panels

Bottom and sheer panels are now glued up as well.

I cut down some hockey sticks to better clamp panels to the table.  I also worked to minimize squeeze out on the outsides (side facing down), but wiping up any drips and any epoxy that made it’s way to the outside as I applied to the puzzle joints.  I also used a work like to help warm the panels.  This definitely reduced the time for the epoxy to cure (though full cure will take several days)

Here is a section of MAS epoxy cure time table the times are :

 TEMP                                        Pot Life / Thin Film Set / Full Cure

Temp (Fahrenheit)          Slow Hardener                Medium                            Fast

95°F 11.5m/2:30h/2.5d 6.5m/1:30h/42.0m 3.5m/1.0h/1.0d
86°F 17.25m/3:45h/3.75d 9.75m/2:25h/63.0h 5.3m/1:30h/1.5d
77°F 23.0m/5.0h/5.0d 13.0m/3.0h/3.5d 7.0m/2.0h/2.0d
68°F 34.5m/7.5h/7.5d 19.5m/4.5h/5.25d 10.5m/3.0h/3.0d

My base is about 68 degrees, but with the work light I am able to warm the panels to 90-95 degrees. According to MAS the cure time reduces by about half for every 17 degrees warmer.  I found this to be pretty close on my panels. Slow hardener was shipped with my kit.

The final panels that need to be glued up at this stage is the rear deck panel. I have some family visiting from out of town today, but I am still hoping to get that final panel glued up, then next week I can begin the task of beveling the panels.

Screen Shot 2020-02-23 at 8.08.53 AM


Glueing Bottom Panels

As much as I would like to glue all the panels at once, it’s just too cold in the garage.  So I setup a table and some stands in my basement and I can at least do pairs of bottoms, sides etc at a time.  I started with the bottom panels yesterday.  The instructions call for epoxy mixed with some filler.  I set up the gallon of resin and half gallon of hardener with their pumps and primed.  Then I mixed a single pump batch as a test just to make sure the mix ratios were good. Because the kit ships with slow resin it was going to take at least 30 minutes to start setting up.

In the mean time I set up the panels to be ready for glueing.  I cut two gallon size plastic bags and spread under the panel.  Then laid out the panels so that the sides I wanted on the outside were facing down and insides up.

img_6468

I precut the three inch fiberglass tape to fit over the puzzle joints so they were a couple of inches longer than the width of the panels.  I also laid some painters tape a couple of inches outside the joint for reference.

Once the test best went off and hardened I was confident pumps were dispensing at the correct ratio. I put on my latex gloves and mixed two pumps of resin and hardener and two spoonfuls of thickener.  I mix about 1 minute for each pump of resin.  In hindsight I think the mixture was a little thicker than the prescribed mustard consistency, I’ll use less next time.  I brushed epoxy on the inside of the joints of the first pair of panels, fitted the joint together and brushed some more across the top and laid the tape across, the repeated for the second pair of bottom panels, double checking I had mirror image pairs.

img_6469

Then as I went back to fully wet of the tape I ran out of epoxy, so I mixed up some more (and way more then I needed to wet out), but now I know probably 3 pumps of epoxy, with a bit less filler should be just about right for the side panels which I hope to get to today. I clamped down a couple of yardsticks and used some books to keep everything flat.  I let it set up for about 90 minutes and went to check and it was setting very slowly, note the basement temperature is mid 60 degrees.  So I set up a hair blow dryer on a stool about three feet from the table to gently warm while I went to pick up our dogs for doggy daycare.  I was back in about 30 minutes and the combination of extra time and warmth set the epoxy nicely.  I let it sit overnight and checked this morning.  It turned out pretty good, but I can tell were there is some thicker mixture under some parts of the tape, so I’ll be interested to see how the side panel go today.  I’m also curious to see how well the plastic bags come off the outside of the panel any squeeze through or slop from my painting joints on the outside.  But since they are the bottom panels they won’t really be seen much, so my learning might change up how I do the more visible panels.

I’m planning on doing the side panels next.

Shearwater Sport Kit Contents

When I picked up the kit this past weekend my wife asked, is that it? just the two boxes.  Granted the one box as 98″ x 30″, but yup that’s it.  I was also given a check list of all the parts which is helpful in identifying all the parts and to make sure everything was included.


Last night I opened up the two boxes to check on the contents.  Small box, which has the epoxy kit seemed to weigh almost as much at the parts box.  It has 1.5 gallons of resin, .75 gallons of hardener, two containers of wood flour and on of Cell-O-Fill which is an alternate thickener to colloidal silica.

Next the large kit box as open.  I picked it up off the floor and put on to the bench, while bulky its weight was manageable. I cut the half dozen straps the held the the cardboard box together.  The pulled off the tow open ended boxes from each the end of each side and opened up the cardboard.

Everything except the foam parts were taped down to the box. Most of the hardware, seats, foot braces, fiberglass cloth was on top and the plywood parts on the bottom.  I went through the checklist and everything seemed to be accounted for.  I pulled out the manual and now it’s time to read in earnest before starting any building.

Seems that joining the the parts with puzzle joints will be the first step and likely topic of the next post.

Road Trip to Annapolis, MD – Chesapeake Light Craft

This past weekend my wife and I drove to Annapolis to pick up my Shearwater Sport Kayak kit, at Chesapeake Light Craft’s showroom and factory.  We left Sunday around 11:30 and planned to hit one of out favorite restaurants, G&M, near Baltimore.  They are famous for their huge Maryland crab cakes.

crabcake-cooking

After our fill of crab cakes we set off for for Annapolis which was about a 20 minute drive from the restaurant.  We still had some sunlight left in the day so we headed over to Chesapeake Light Craft just to see where it was, as they are not open on Sunday.

After a good nights sleep at the hotel, we were back the next morning.  As one walks in the showroom doors you there are boats everywhere. To the left was a wall full of Wood Duck Kayaks, then a stack of Shearwater and Petrels

img_6445img_6447

And on the right was Chesapeake and Mill Creeks!!

img_6446

And this stock photo from CLC’s web site shows additional boats on the back wall including a sit on top and a double.

clcstock

I checked in with Nicki and went to get my kit.  Its in two boxes 98x30x3 inch one for the everything except the epoxy, and a 12x12x12 box for the epoxy kit.  It barely fit in our vehicle, despite my measuring at home to ensure we’d be able to get it in . Strapped in for extra measure, needed to be on its side to slide up next to the front seat to fit.

img_6444

I also walked over to another room where they had the Teardrop trailer and PocketShip #1.

img_6449

img_6448

Our drive one was uneventful and here is the kit unloaded in the garage workshop. I picked up a few extras like filet tools and UV-prohibiting varnish. So next will be opening up the kit and taking inventory.

img_6452